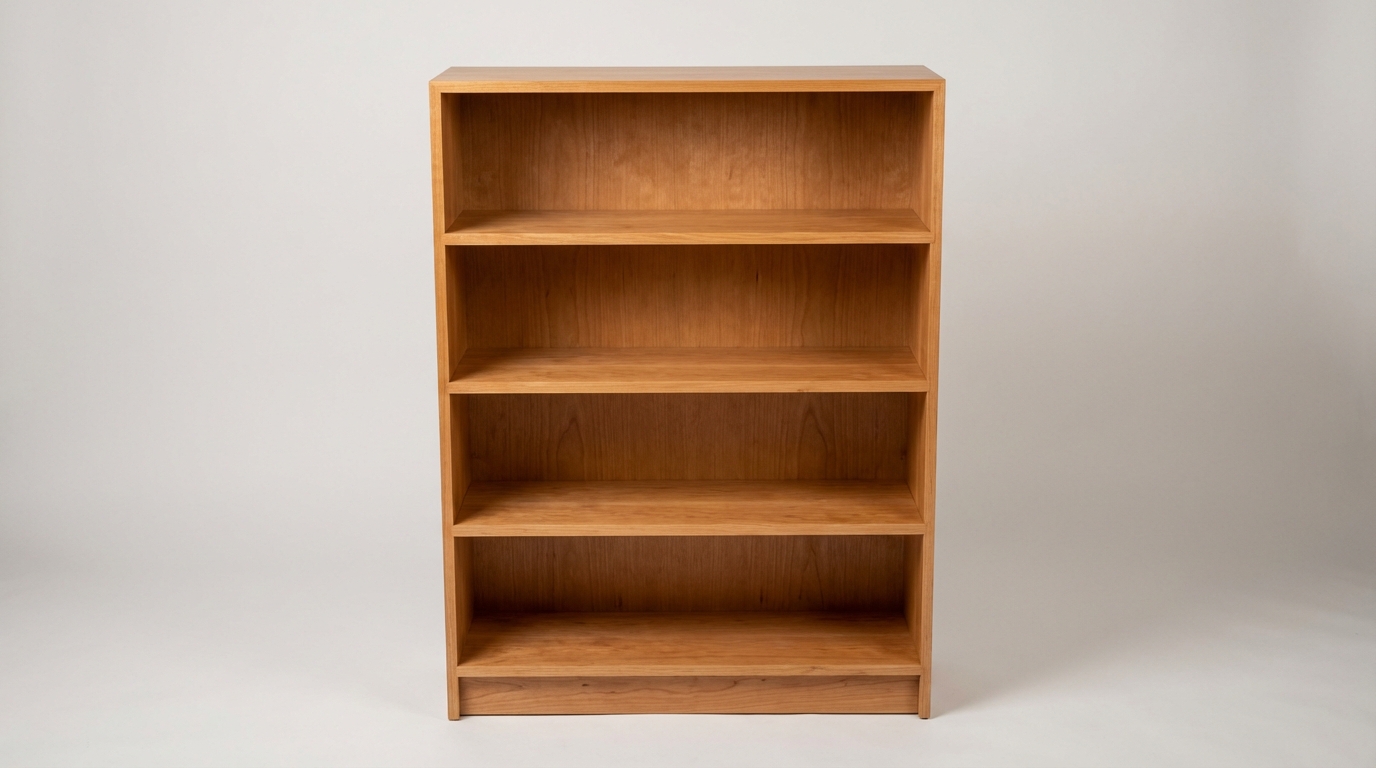
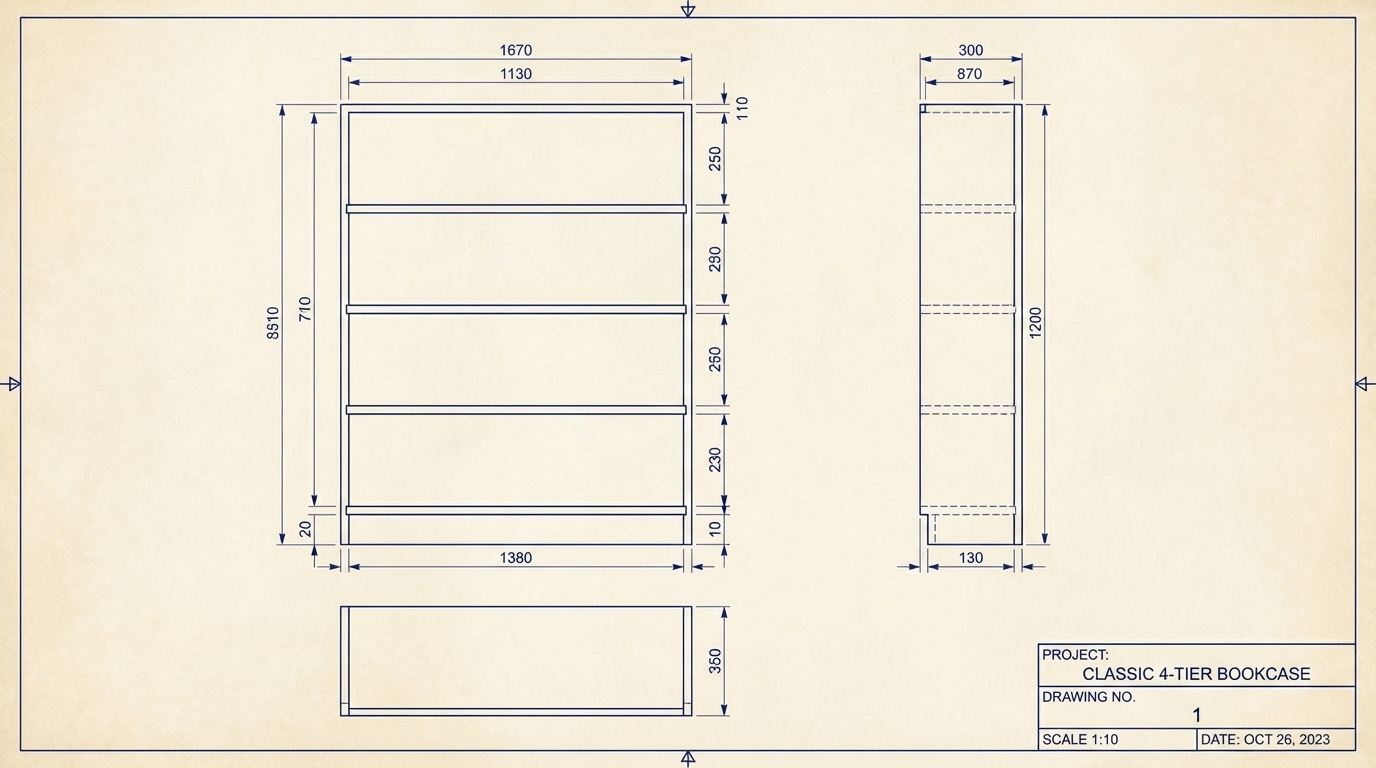
Bookcase DIY Wood Plans
Beginner
Classic 4-Tier Bookcase
A sturdy, beginner-friendly wooden bookcase built with hidden pocket-hole joinery for seamless lines.
Step-by-Step Plan
- 1 Cut all pieces to size using a miter saw or circular saw. Cut two Side Panels at 47.25 inches, one Top Panel at 36 inches, and four Shelves at 34.5 inches from the 1x12 pine. Cut the 1x3 Kickplate to 34.5 inches.
- 2 Drill three pocket holes on both ends of all four Shelves. Ensure you drill these on the bottom face of the boards so they remain completely hidden from view when standing and looking at the finished bookcase.
- 3 Drill three pocket holes on the inside top edge of each Side Panel. These will be used later to attach the Top Panel smoothly from underneath.
- 4 Mark shelf height layout lines on the inside faces of both Side Panels using a tape measure and square. Measuring from the bottom edge, mark lines at 2.5 in. (Bottom Shelf), 13.25 in. (Shelf 2), 24 in. (Shelf 3), and 34.75 in. (Shelf 4).
- 5 Attach the Kickplate and Bottom Shelf to the first Side Panel. Apply wood glue to the ends, place the Kickplate 1 inch recessed from the front edge, and position the Bottom Shelf directly above it at the 2.5 in. mark. Drive 1-1/4 in. pocket screws to secure them.
- 6 Attach the remaining three Shelves to the same Side Panel. Align the top of each shelf precisely with your layout marks. Clamp a speed square in the corner to ensure they join at a perfect 90-degree angle before driving the 1-1/4 in. pocket screws.
- 7 Install the second Side Panel. Lay the bookcase assembly on its side and slide the second Side Panel into place. Align all the shelf ends to your layout marks, apply wood glue, clamp firmly, and drive 1-1/4 in. pocket screws into every shelf.
- 8 Attach the Top Panel to the assembly. Lay the Top Panel flat on your workbench and invert the bookcase onto it, ensuring all outer edges are perfectly flush. Drive 1-1/4 in. pocket screws upward through the pre-drilled holes in the Side Panels into the Top Panel.
- 9 Install the Back Panel to square up the entire structure. Lay the bookcase face down on the floor, apply a continuous bead of wood glue along the back edges of the frame and shelves, and secure the 1/4 in. plywood using 1 in. brad nails spaced every 6 inches.
- 10 Sand the entire bookcase starting with 120-grit sandpaper to remove any rough patches, followed by 220-grit for a smooth finish. Apply a pre-stain wood conditioner, then finish with your choice of stain and two coats of clear polyurethane, sanding lightly between coats.
Cut List
| Piece | Dimensions | Qty | Source |
|---|---|---|---|
| Side Panels | 3/4" x 11.25" x 47.25" | 2 | 1x12 Pine |
| Top Panel | 3/4" x 11.25" x 36" | 1 | 1x12 Pine |
| Shelves | 3/4" x 11.25" x 34.5" | 4 | 1x12 Pine |
| Kickplate | 3/4" x 2.5" x 34.5" | 1 | 1x3 Pine |
| Back Panel | 1/4" x 36" x 48" | 1 | 1/4" Plywood |
Tools Needed
Miter Saw or Circular SawDrill/DriverPocket Hole Jig (Kreg Jig)Brad Nailer (or Hammer and Panel Nails)Tape MeasureSpeed SquareWood ClampsRandom Orbital Sander
📐 Assembly Drawing
Written by
Sawinery's Team
Sawinery is your ultimate destination for all things woodworking — your trusted hub for expert advice, practical guides, and in-depth recommendations. Discover answers to your woodworking questions, along with curated tips on tools, projects, books, videos, DIYs, and hands-on techniques to elevate your craft.